How to create Westcliff email signature
Westcliff University has prepared the following instructions for employees to follow in setting up the Email Signature.
Step 1: Copy and Paste the following URL to your Web Browser to access the Signature Generator.
https://westcliff.edu/email-signature/Westcliff/oneTitle/email-signature.html
Step 2: Enter your information into the fields and click Submit.
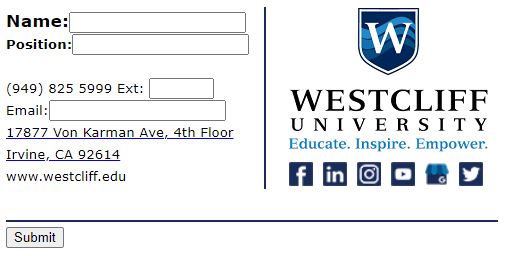
Step 3: Once you enter your information, it will look similar to the example below.

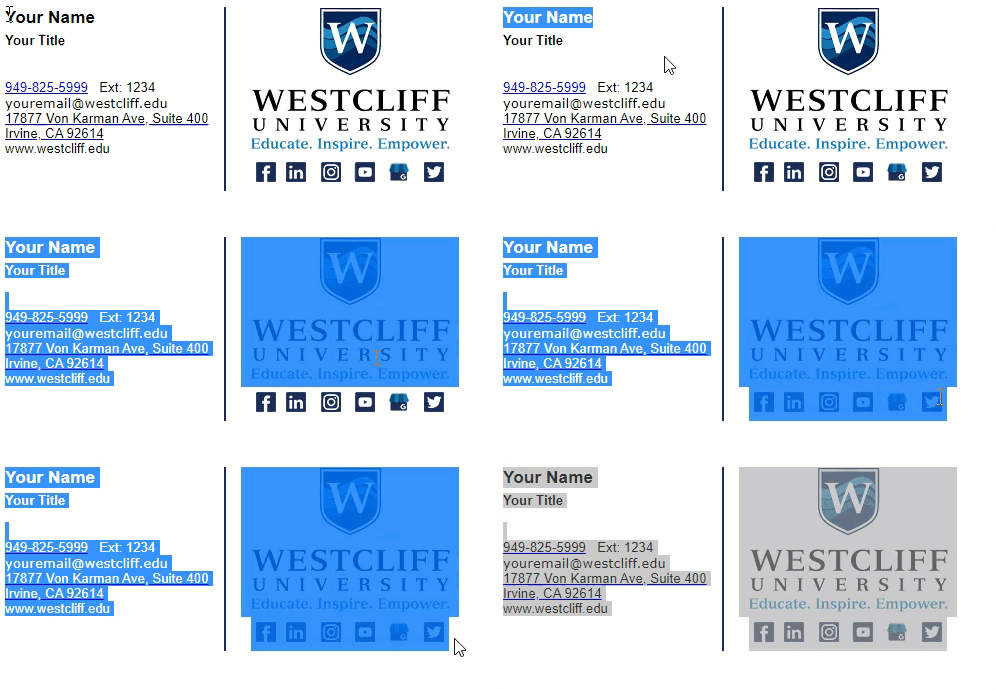
Step 4: Select your Signature from left to right and Copy.
Note: Do not drag your mouse too far from the signature
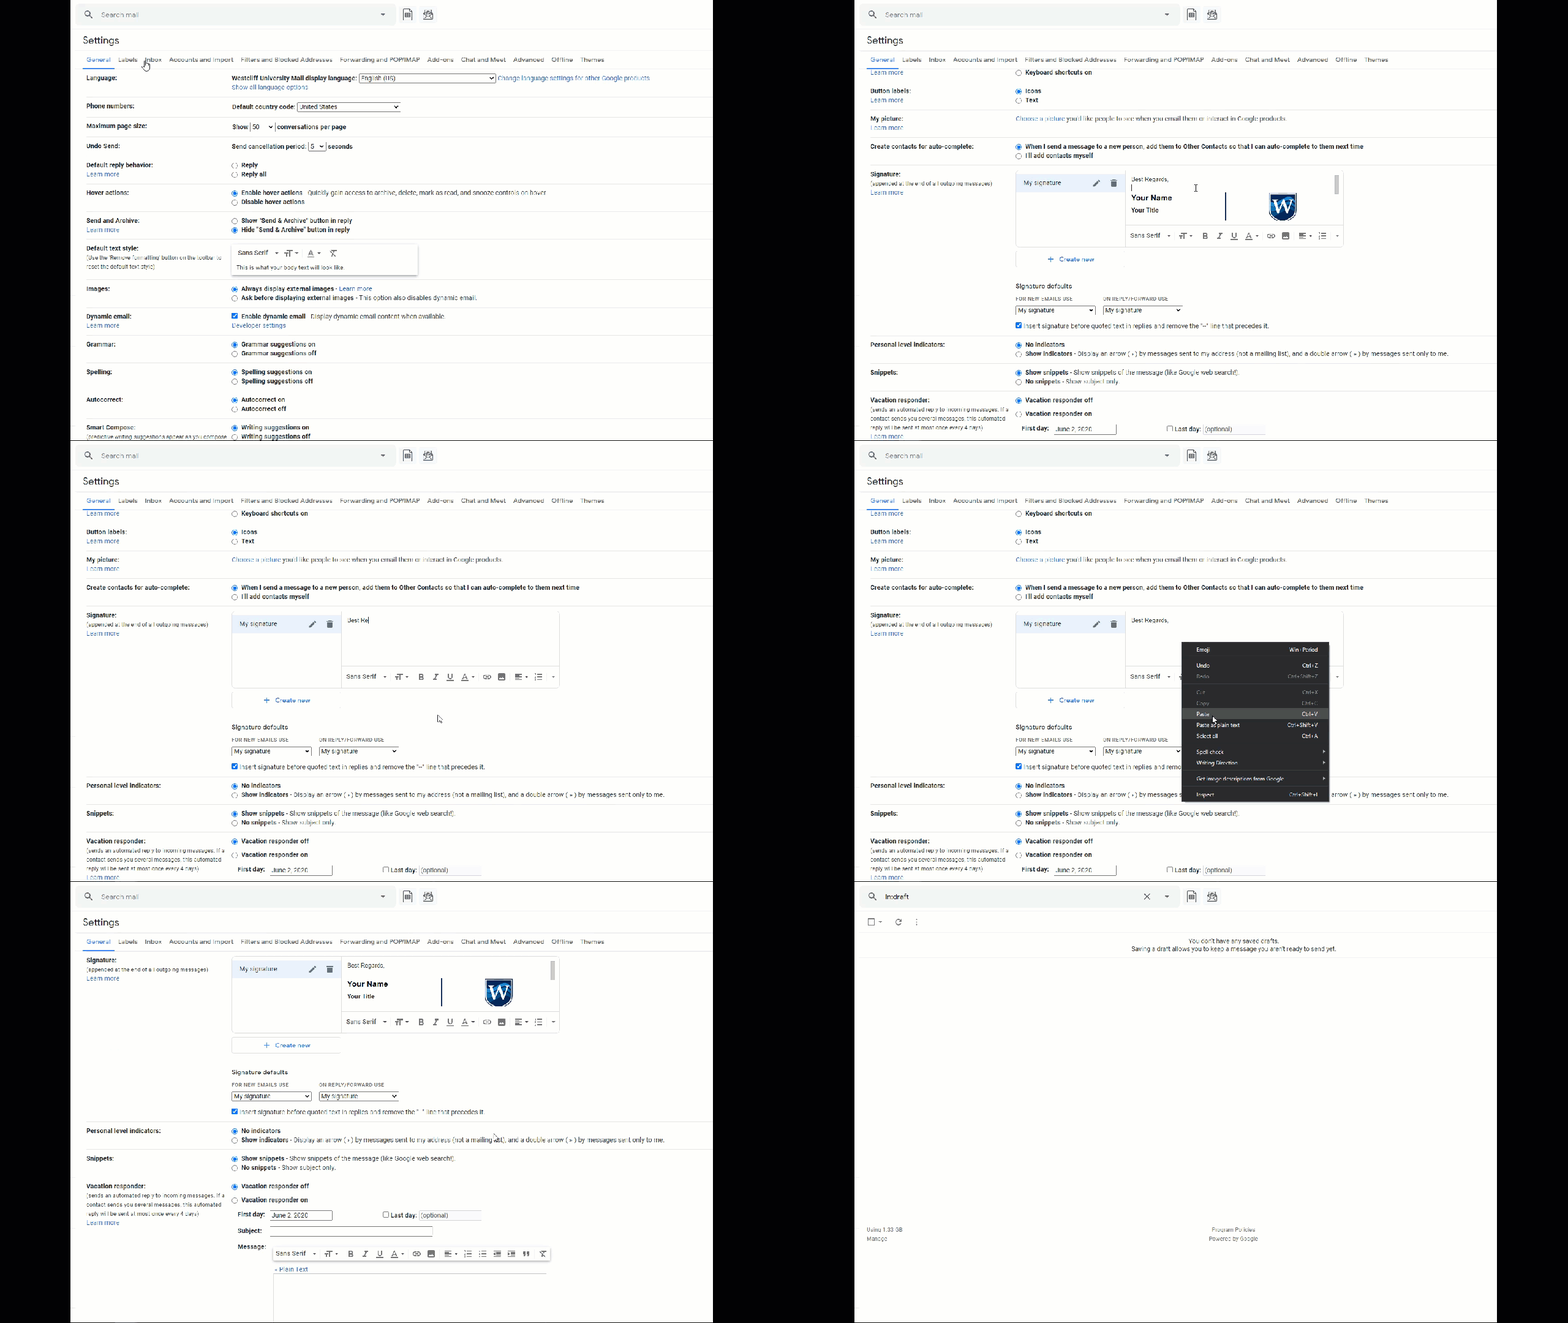
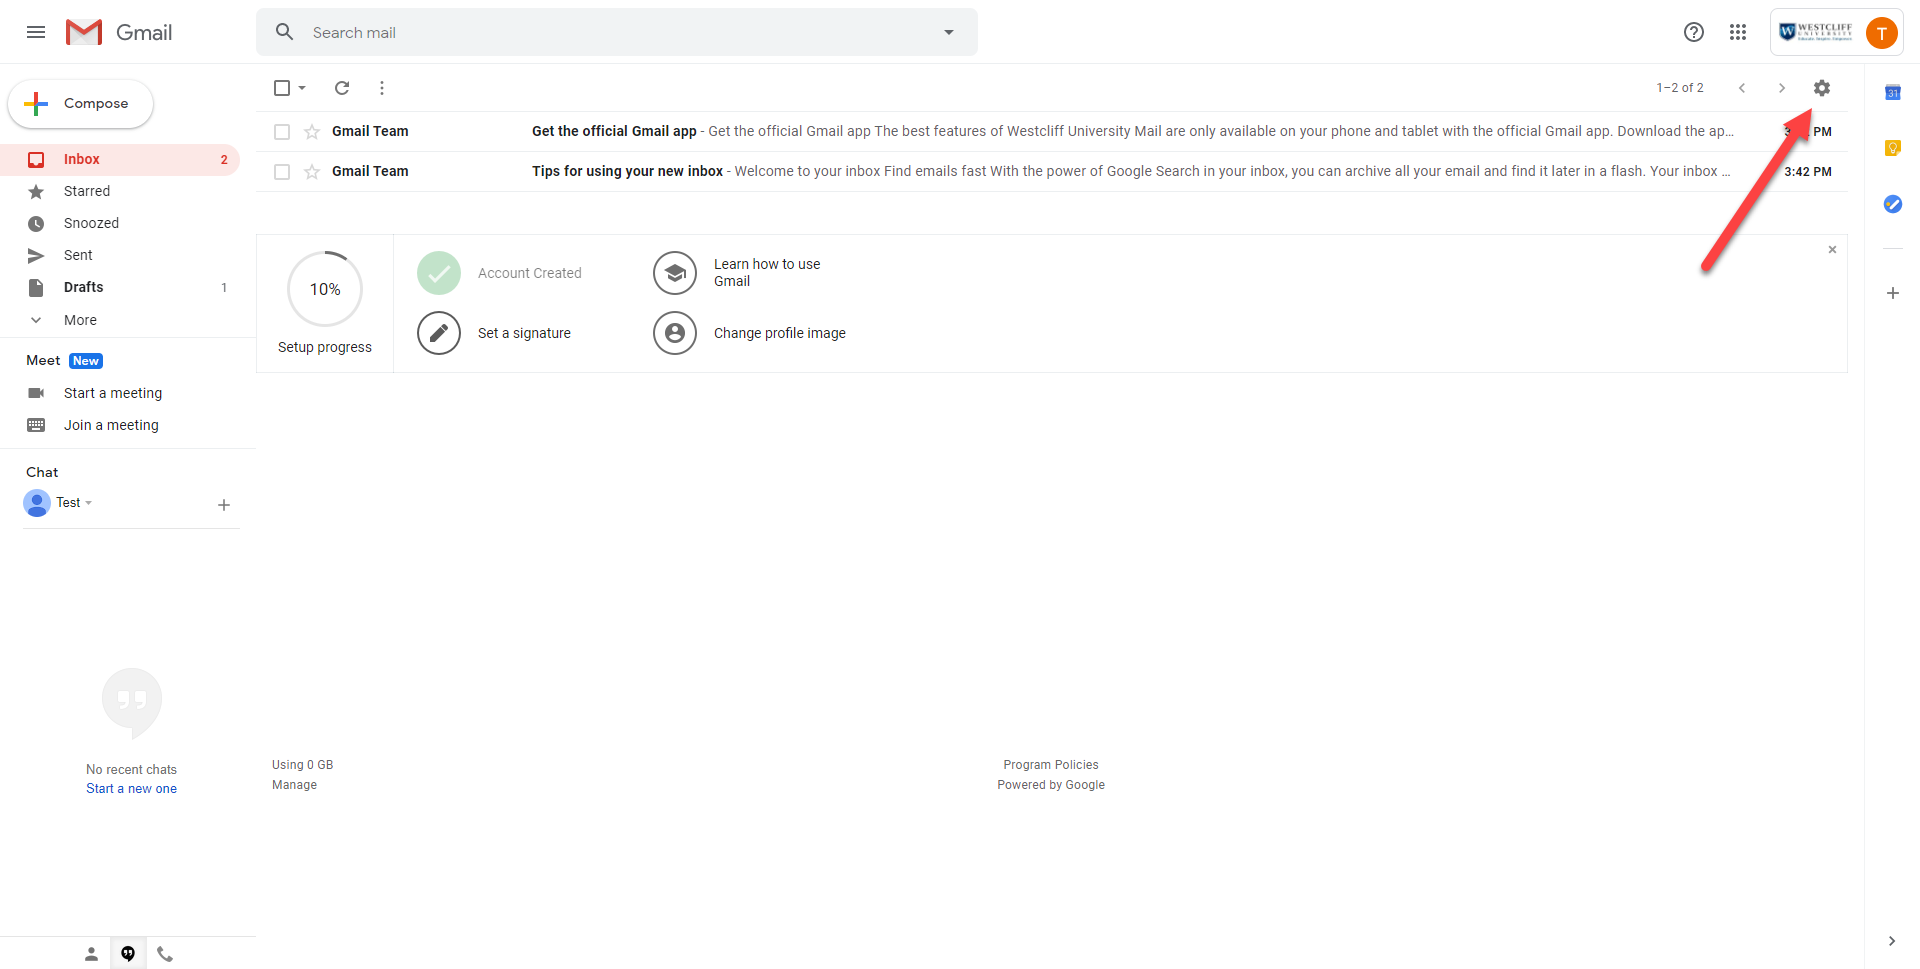
Step 5: Go to your Gmail Settings
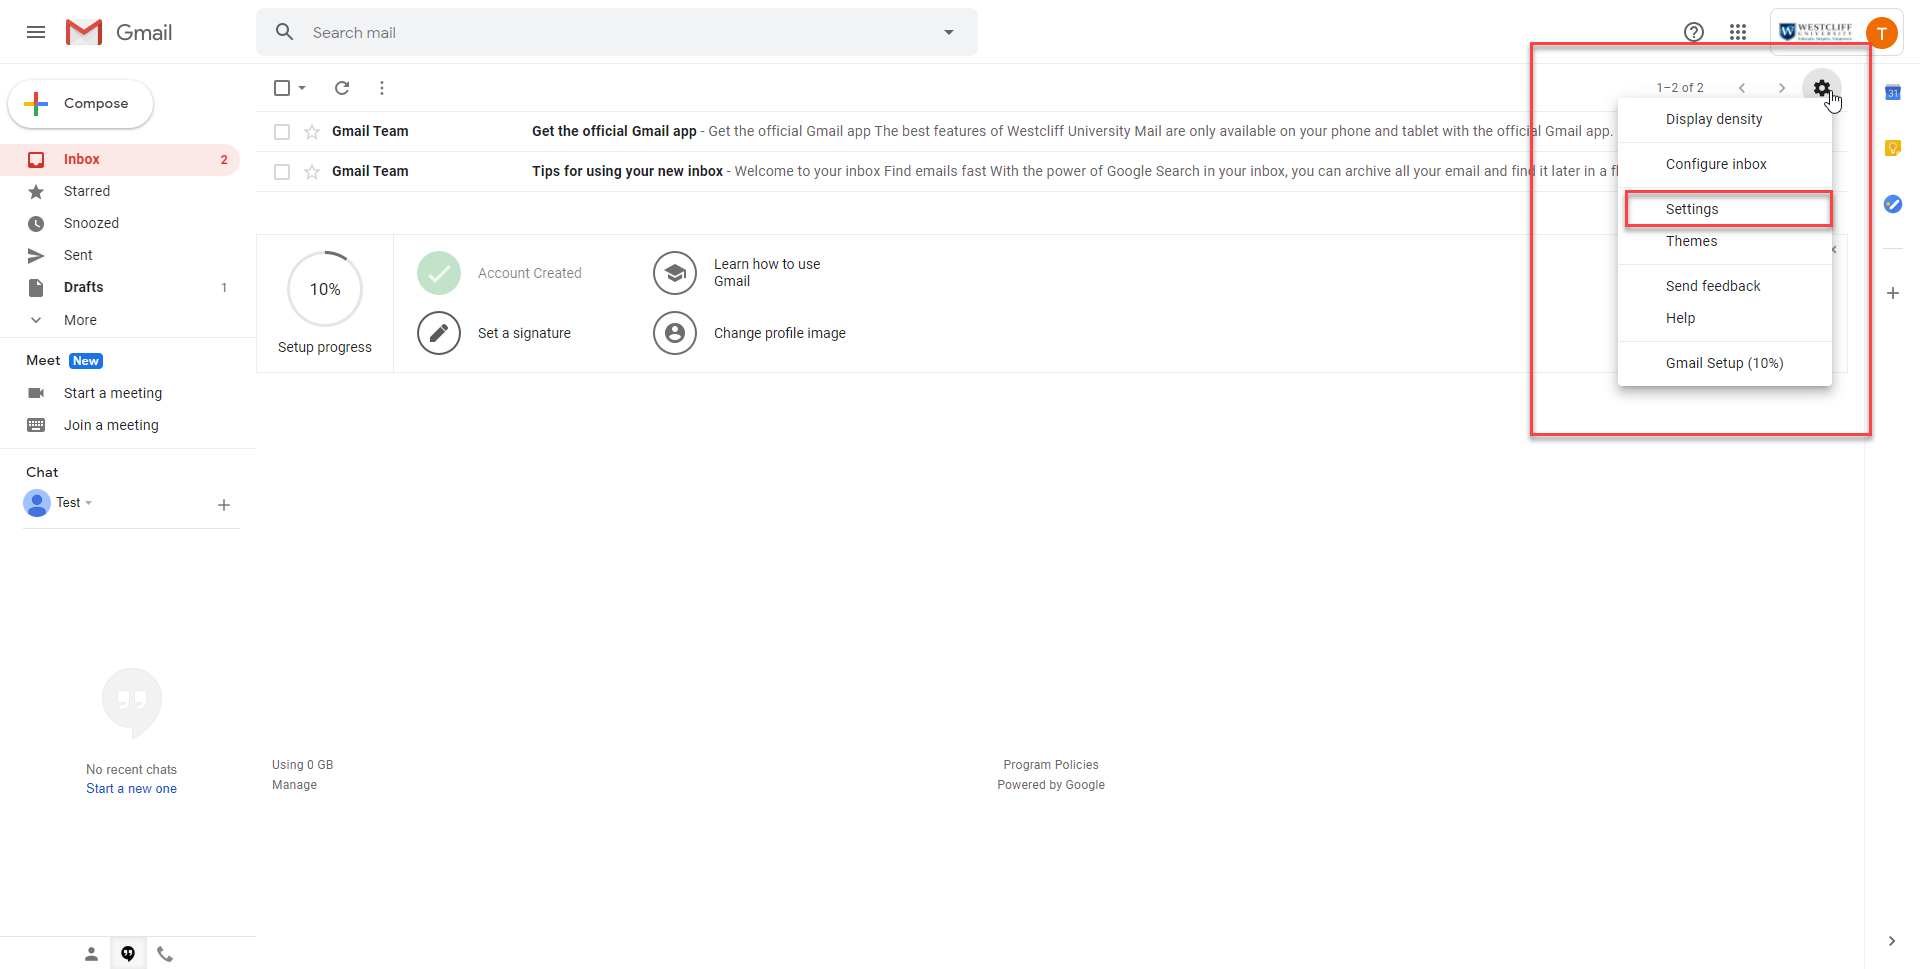
Step 6: Paste your New Email Signature
- Under the General tab, scroll down to the Signature section.
- Remove your old signature by selecting all and delete, it will clear all of the old format.
- Simply Paste the signature that you Copied from Step 4 and click Save Changes.
